
The number of priceless images kept on our computers will grow exponentially as time goes on. However, the number of identical or nearly identical items will also tend to rise. This eats up storage space on your computer and might make sorting your photo collection a nightmare.
You must read on in case you run into such problems. What follows is a free guide on identifying and deleting duplicate photos in Windows 11 and 10, as well as instructions on preventing this problem from occurring again. These manual methods and the best duplicate photo finder will help you quickly find and remove large duplicate photos from Windows.
Why Your Computer Has Duplicate Images?
There are a few potential explanations for why your computer’s hard drive is displaying duplicate photos:
- You unwittingly duplicated or saved the identical photo multiple times.
- You aimlessly or purposefully press the shutter button multiple times while capturing a breathtaking scene, and then you save all those photos to your computer.
- You can create multiple photo copies on your PC by clicking the download button.
- After processing, images often need to be more processed and look identical.
- When importing or synchronizing photos, some programs or tools may make a copy of the original.
There are many other reasons images look alike. Purging your photo library of clutter is most important. Thus, consider these methods.
Methods for Locating and Eliminating Duplicate Photos from Windows
You can locate and delete duplicate photos from your Windows 10 PC using free methods. Let’s take a look at them.
Method 1: Duplicate Photo Removal in Windows Photos
Your OS comes equipped with the Windows Photos app. You can utilize the Windows Photos app to manage and peruse your photo collection. In addition, you can use it to crop photos or fix red eyes. The Windows Photos app makes it easy to find and delete duplicate photos. Let’s figure it out.
Step 1: Go into the Microsoft Photos app and look at the pictures. Afterwards, you can pick a specific folder to see images in or scroll through all your pictures.
Step 2: Select the “delete” option from the right-click menu’s context menu if you see duplicate photos. If you want to permanently delete an image from your computer, you can do it by transferring it to the recycle bin.
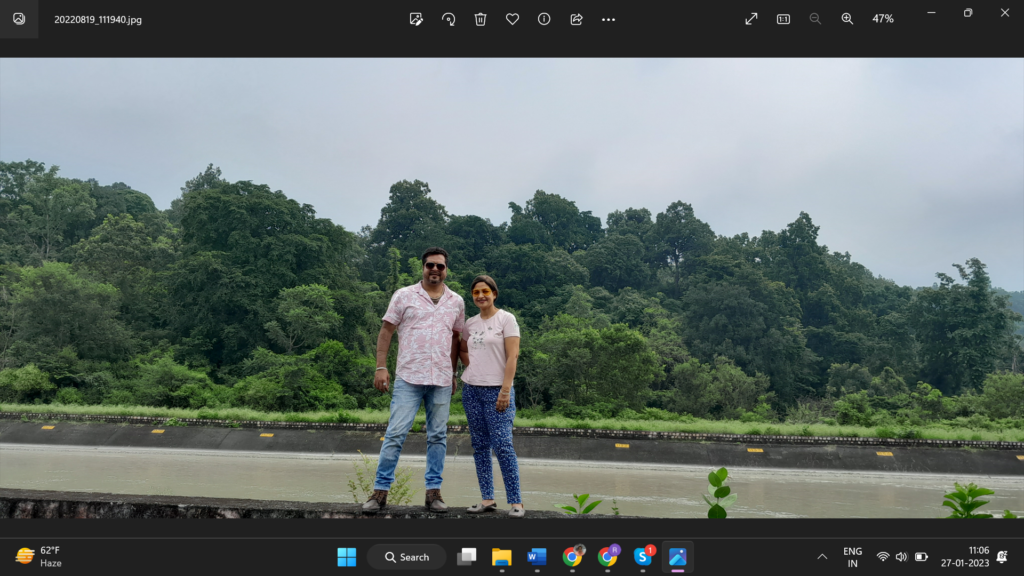
Step 3: You can select all the duplicate photos you wish to delete from a folder by clicking “CTRL” and selecting each one. Choose “Delete” from the context menu after selecting all the photos. In Windows 10, this is how you remove large duplicate photos.
Method 2: Find and Remove Duplicate Photos Using Windows Explorer
This is one of the automated methods to quickly find and remove duplicate photos on Windows. This method is only effective when you have fewer folders and images to search for.
Step 1: Press Win + E to access the Windows Explorer.
Step 2: Access the folder or sub-folder that you wish to check for duplicates. Navigate to the directory that contains your photo collection.
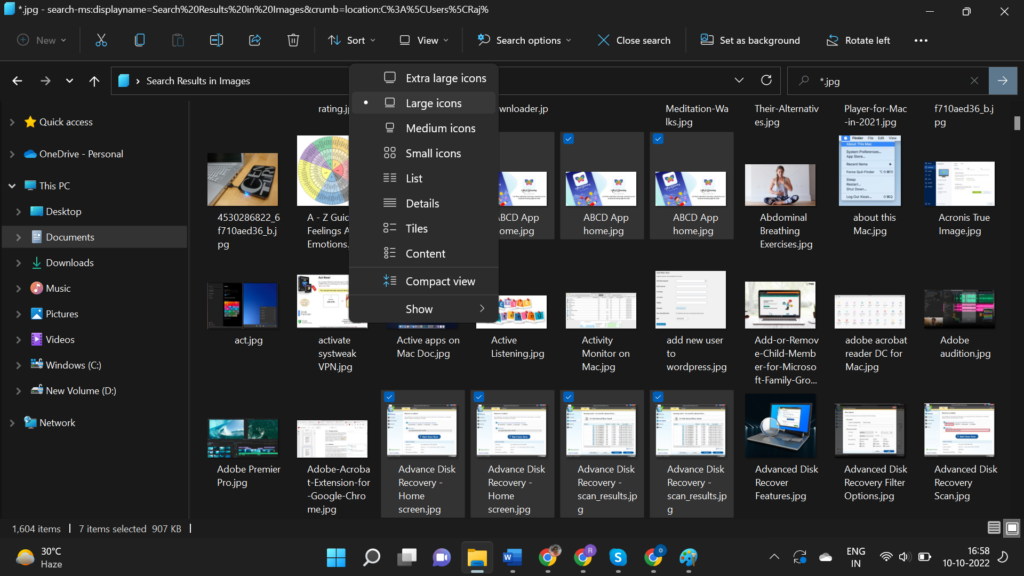
Step 3: Click on the View menu and go for the Large View option. This will show you thumbnails of the images stored in the folder. View and select the icon that looks duplicate.
Step 4: You can also sort images by name, size or date created/modified to sort out duplicate photos. Press the Ctrl key and click to select found duplicates.
Find and remove the bulk of duplicates by scrolling through your photo library.
Method 3: Remove Duplicate Photos with Disk Cleanup
Remove large duplicate photos and other unnecessary files from temporary folders with the help of this built-in Windows tool. It aids disc space freeing and is a good tool for routine maintenance.
Step 1: Launch Disk Cleanup by typing “Disk Cleanup” into the Windows search box.
Step 2: Find the drive that contains your photo collection.
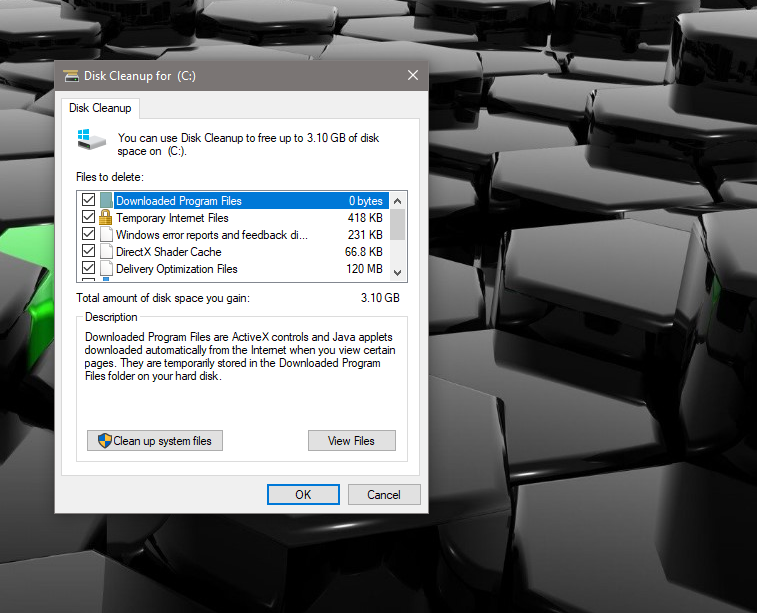
Step 3: Since “Temporary files” can sometimes contain duplicates, check the boxes for them.
Step 4: Go ahead and click “OK” to clean up.
Bonus Tip: Use Duplicate Photos Fixer Pro
If you have duplicate photos on your computer, cloud storage, or other storage devices, here we have the best solution. Duplicate Photos Fixer Pro is an ideal tool to locate and remove them. It employs a smart algorithm to compare photos and display exact copies. The program compares content and other parameters to identify valid duplicate photos rather than searching for them by filename. Finding and removing duplicate photos has always been challenging and faster.
Features:
- Remove duplicate photos from your computer, delete duplicate images from external drive, Picasa, Lightroom Classic, Google Drive, and Dropbox.
- A free, identical picture gallery is yours to keep.
- Get back the storage space that duplicates were taking up.
- With the help of the Exclusion list, you can protect crucial folders.
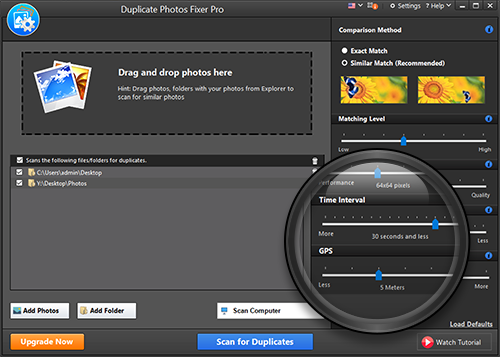
How Do You Use Duplicate Photos Fixer Pro on Windows?
Here are the steps to use Duplicate Photos Fixer Pro:
Step 1: Get Duplicate Photos Fixer Pro started.
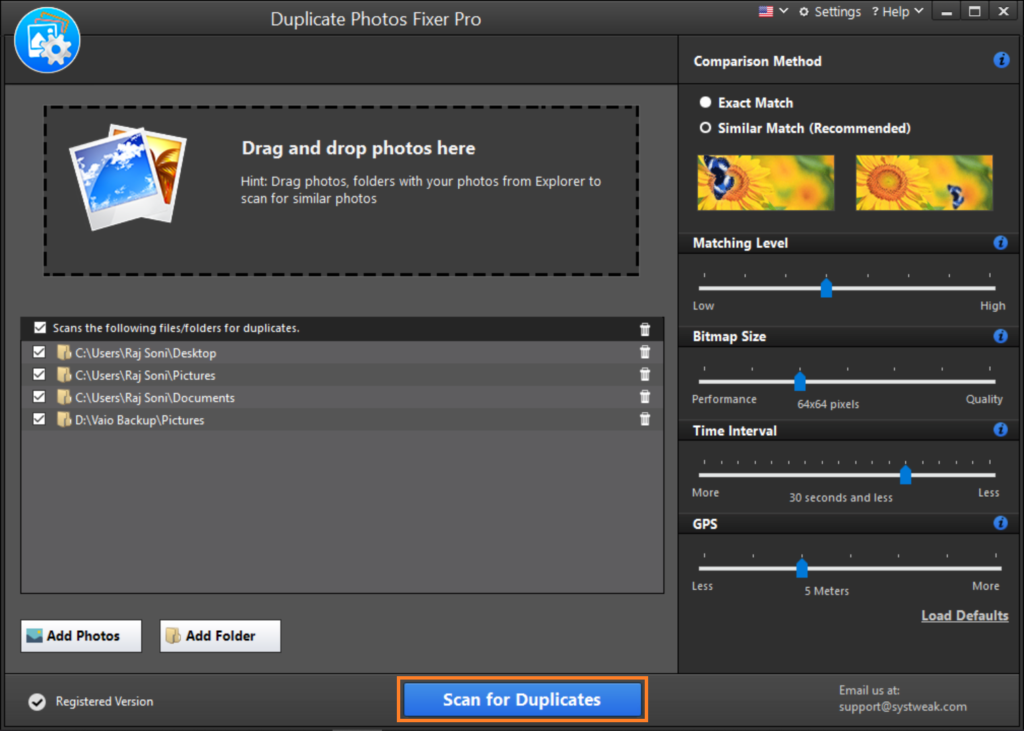
Step 2: Click Add Photos/Add Folder or drag and drop the images to scan.
Step 3: Select “Similar” or “Exact” as the comparison mode.
Step 4: To find large duplicates, adjust the Matching Level.
Step 5: Next, select Scan for Duplicates from the menu.
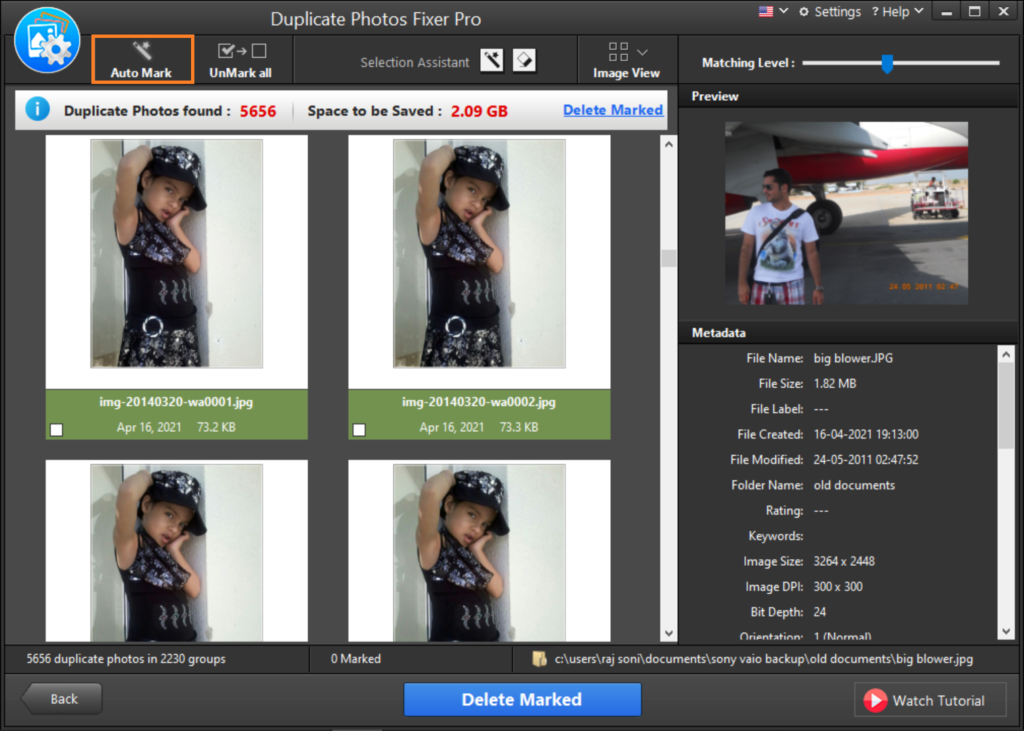
Step 6: Just be patient and let it finish. After that, a window will appear with the scan results. The Selection Assistant and Auto Mark features allow you to choose identified duplicates.
Step 7: At last, to remove the images, click the Delete Marked button.
This is a simple method for cleaning Windows of duplicate images.
Conclusion:
To get rid of GBs of duplicate pictures from your computer, you must follow these methods. It is typical for electronic devices to store a wealth of priceless memories in this digital era. Duplicates hogging valuable storage space on your hard drives are easy to miss, even when you believe we’re very organized. Therefore, we have included numerous methods to remove the bulk of duplicates in this post to assist you. To maintain order on your computer, try these out right now.