Because your iPhone holds more and more personal information about you, you may choose to backup your iPhone to your own server rather than iCloud or iTunes. And personal network-attached storage must be one of the best choices for you. Besides, after months or years of using your iPhone, you may find that your iPhone storage is full of photos, videos, and other sorts of information. To keep your data safe, you also need a more reliable backup solution.
Here comes this guide, offering you detailed instructions to backup iPhone to Synology in two steps. You just need to set up Synology on PC first, and then backup your iPhone to it with a powerful backup tool.
Step 1. Setup Synology NAS on PC
Synology NAS is meant to make storing and sharing files inside a local network easier, therefore you may use Windows Explorer to save files on your Synology NAS. As a result, you should first map an Internet location for it in Windows Explorer. Here are the detailed steps.
Step 1. Open a Windows Explorer window and go to Computer > Click Map network drive.
Step 2. On the prompt window, choose a drive letter. In the Folder field, enter the server name of your Synology NAS and shared folder name preceded and separated by backslashes.
Step 3. Enter your DSM username and password and click OK.
Finally, a Windows Explorer appears. Your shared folder will be mapped and accessible under Computer.
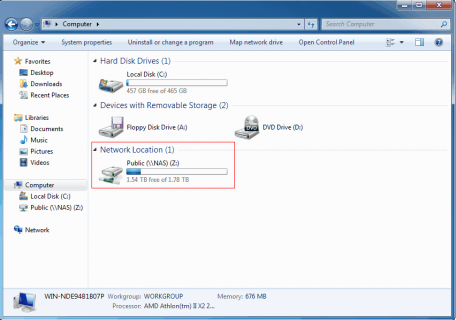
After mapping the Internet location, you can backup iPhone to Synology NAS using the tool introduced in the next part.
Step 2. Backup iPhone to Synology NAS with AOMEI MBackupper
As professional iPhone backup software, AOMEI MBackupper can enable you backup iPhone to local folders on computer, external hard drives, and of course, Synology NAS.
You will be given two ways to backup your iPhone to Synology NAS, which are backup selective files and everything from iPhone to NAS. Download the tool to your computer, and let AOMEI MBackupper help you backup iPhone to Synology NAS according to your needs.
How to backup everything from iPhone to Synology NAS
The Full Backup function in AOMEI MBackupper helps you to backup everything on iPhone, which is pretty useful when you need to factory reset your iPhone or restore iPhone data to a new iPhone. Here are the steps.
Step 1. Connect your iPhone to computer with a USB cable > You may need to tap Trust on your iPhone if you connect the iPhone to computer for the first time.
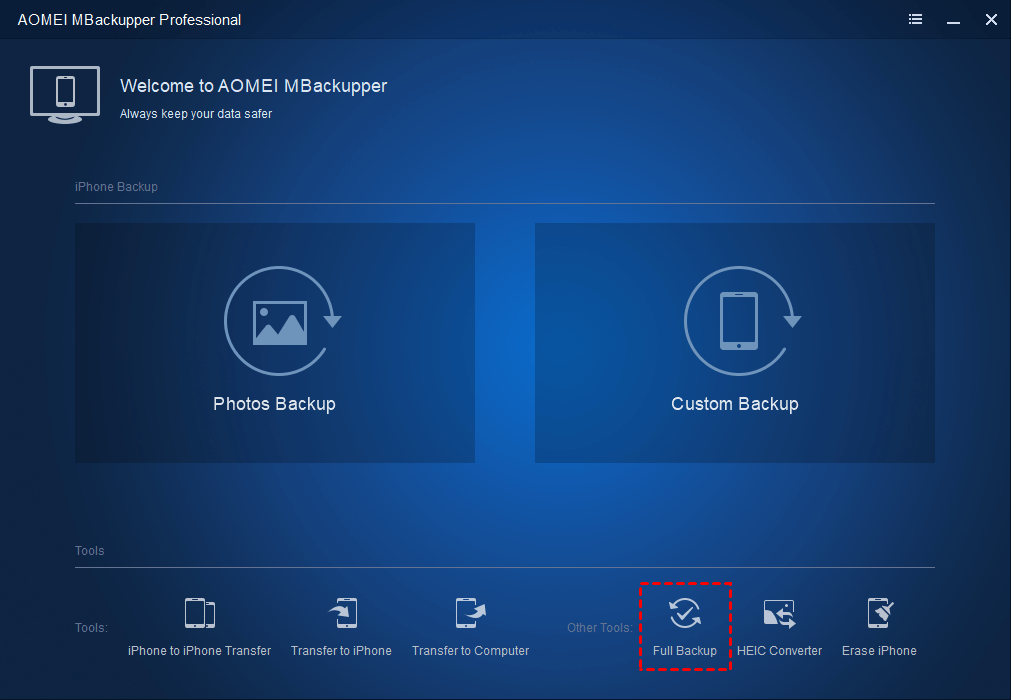
Step 2. Launch AOMEI MBackupper > Click Full Backup from the Tools bar in the home interface.
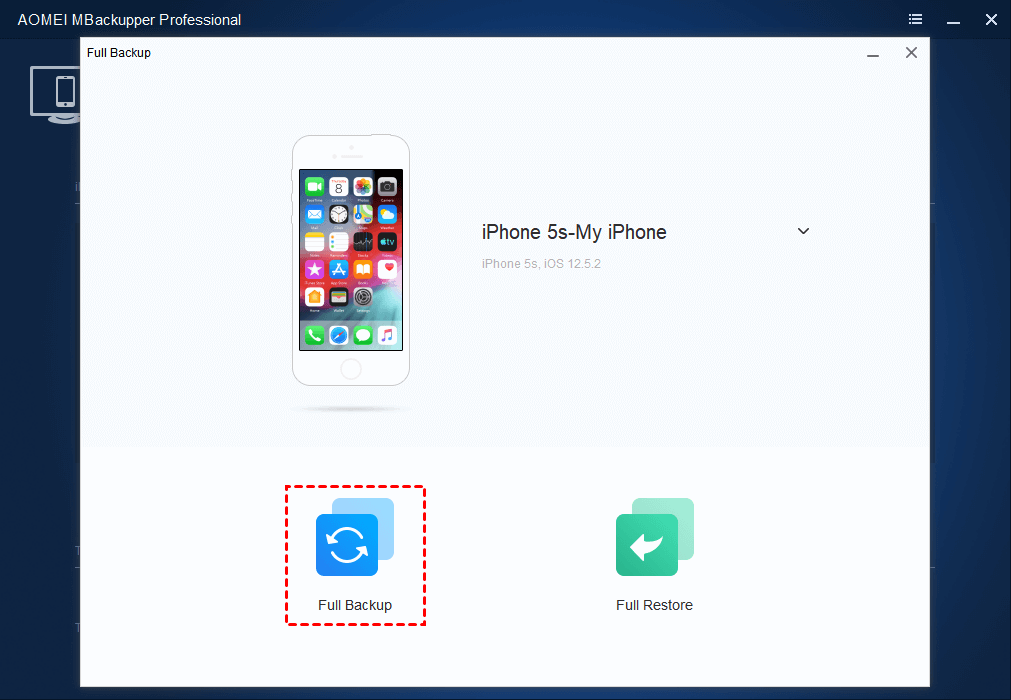
Step 3. Click Full Backup again on the next screen.
Step 4. You can enable Backup encryption as you like. Your data, such as Fitness records, Health, and Keychain can be kept private if you enable it.
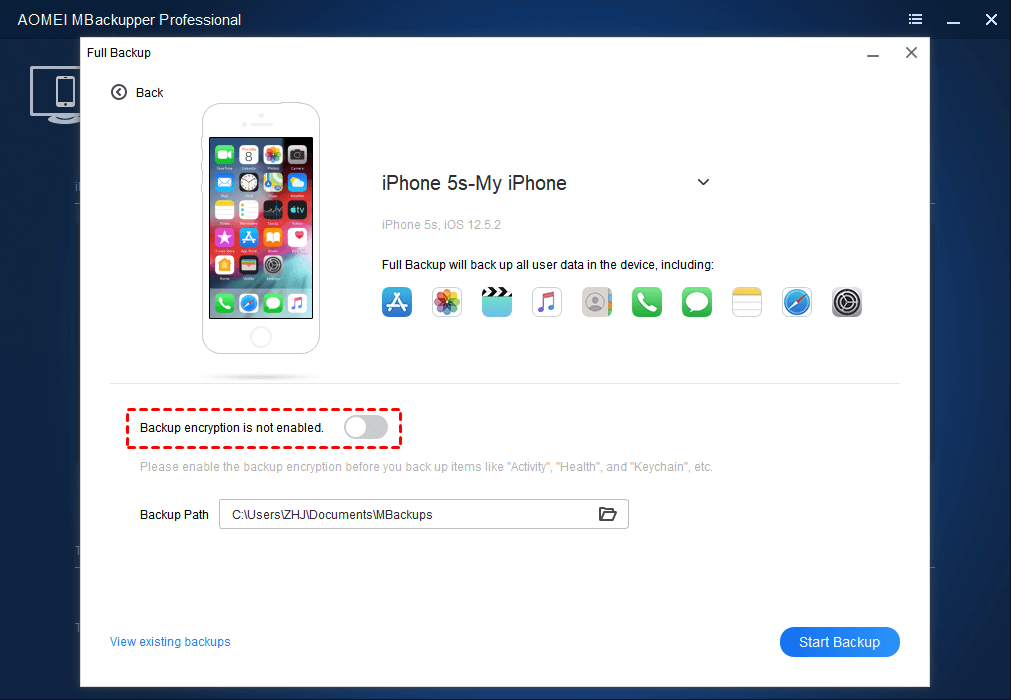
Step 5. In the box of Backup Path, locate and change it to the network location of your Synology NAS > Click Start Backup to begin the task.
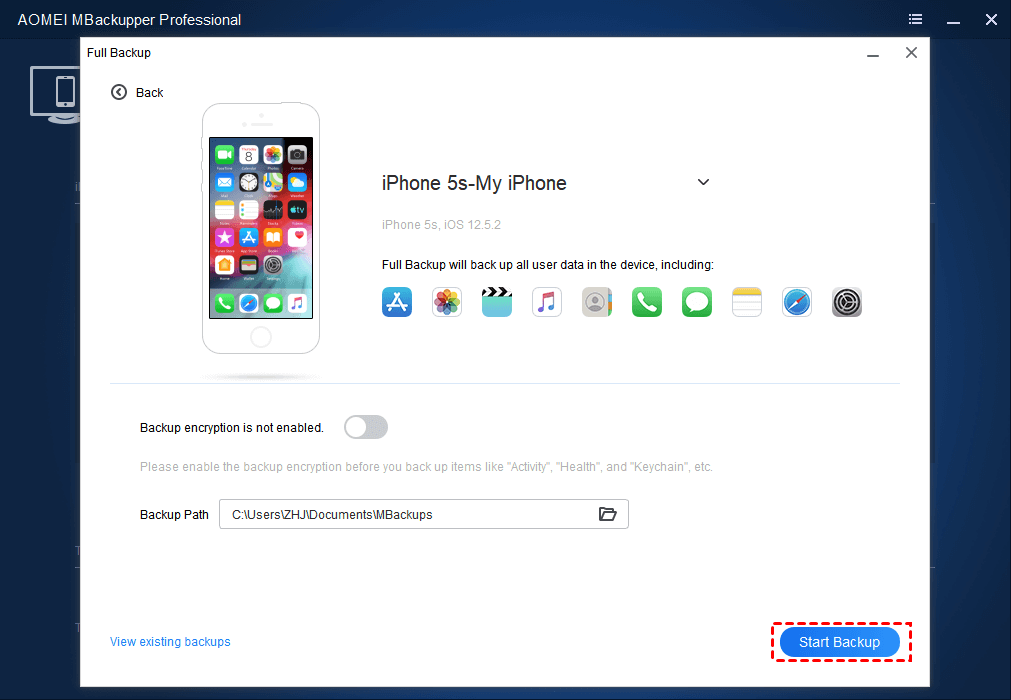
If you want to restore the full backup, you can click Full Backup > Full Restore to make it. The Full Restore also allows you to restore iTunes backup to iPhone.
How to backup selective files from iPhone to Synology NAS
The Custom Backup function provides you with an incremental and selective backup service, meeting your daily backup needs. Follow the three steps below to backup the wanted files to Synology NAS.
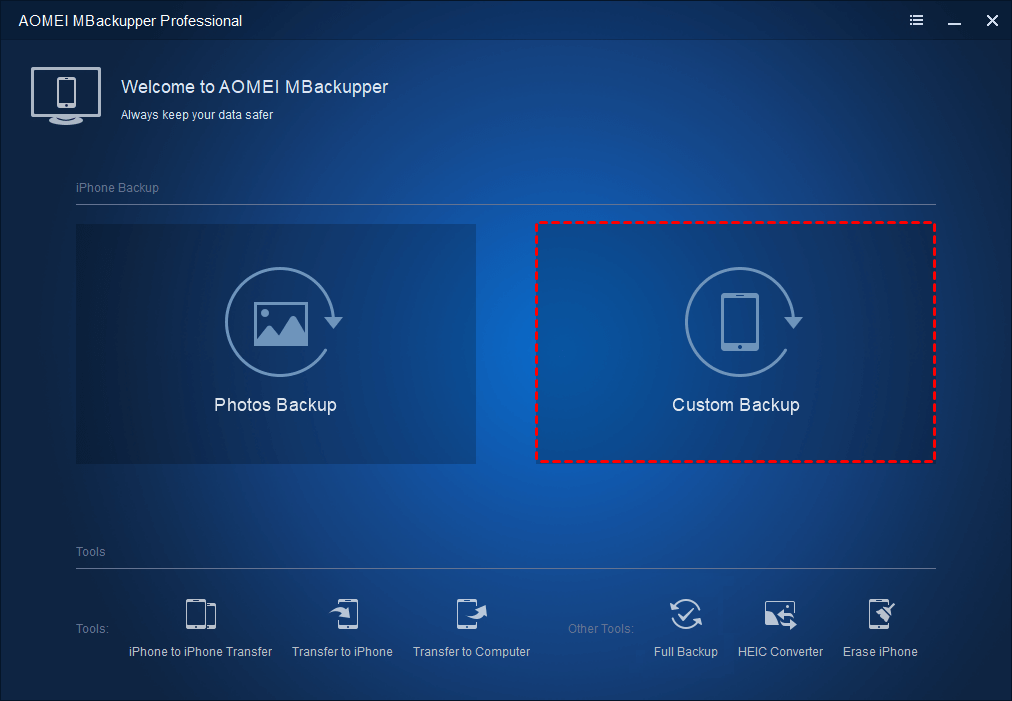
Step 1. Connect your iPhone to Computer > Run AOMEI MBackupper and click Custom Backup (or Photos Backup to backup iPhone photos only).
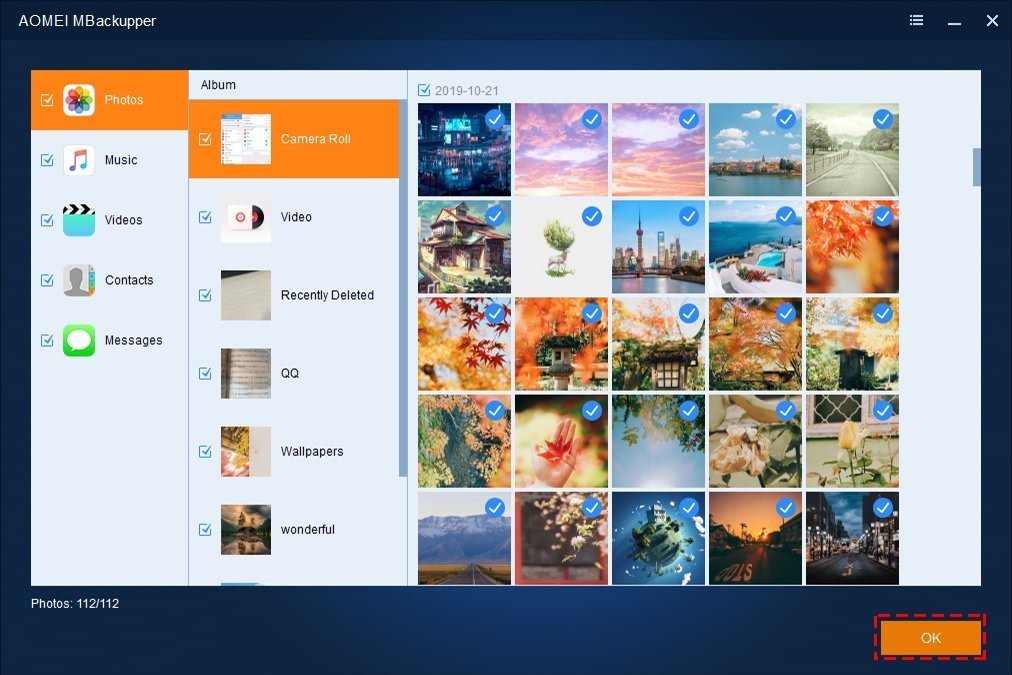
Step 2. Check every icon to preview the files on your iPhone > Select the files you want to backup to Synology NAS > Click OK to continue.
Step 3. Change the backup destination to the network location of your Synology NAS > Click Start Backup to complete the task.
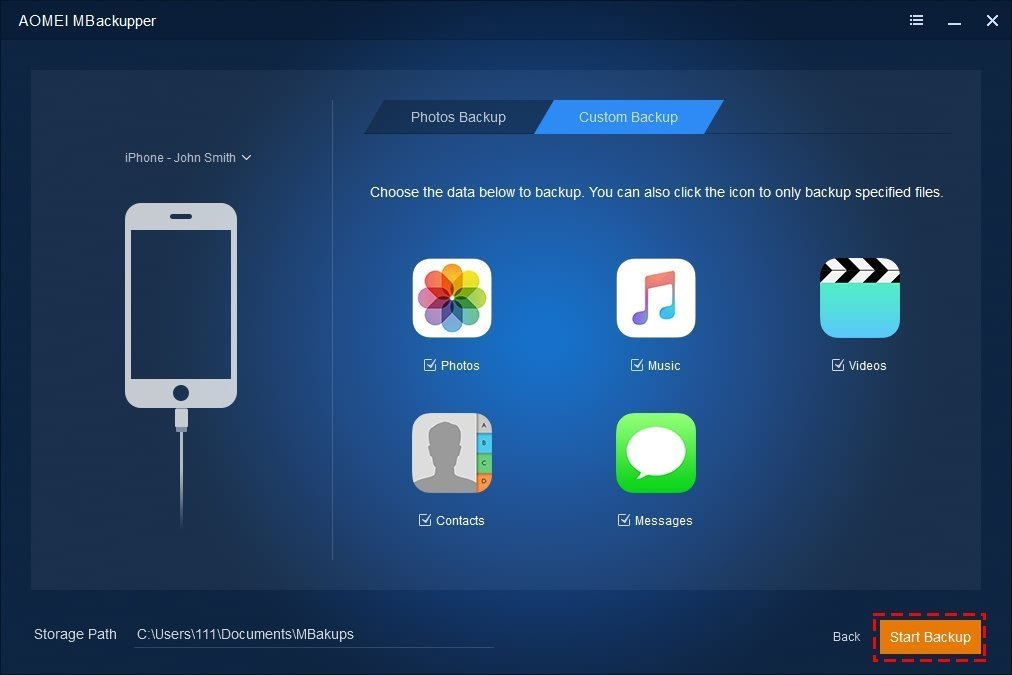
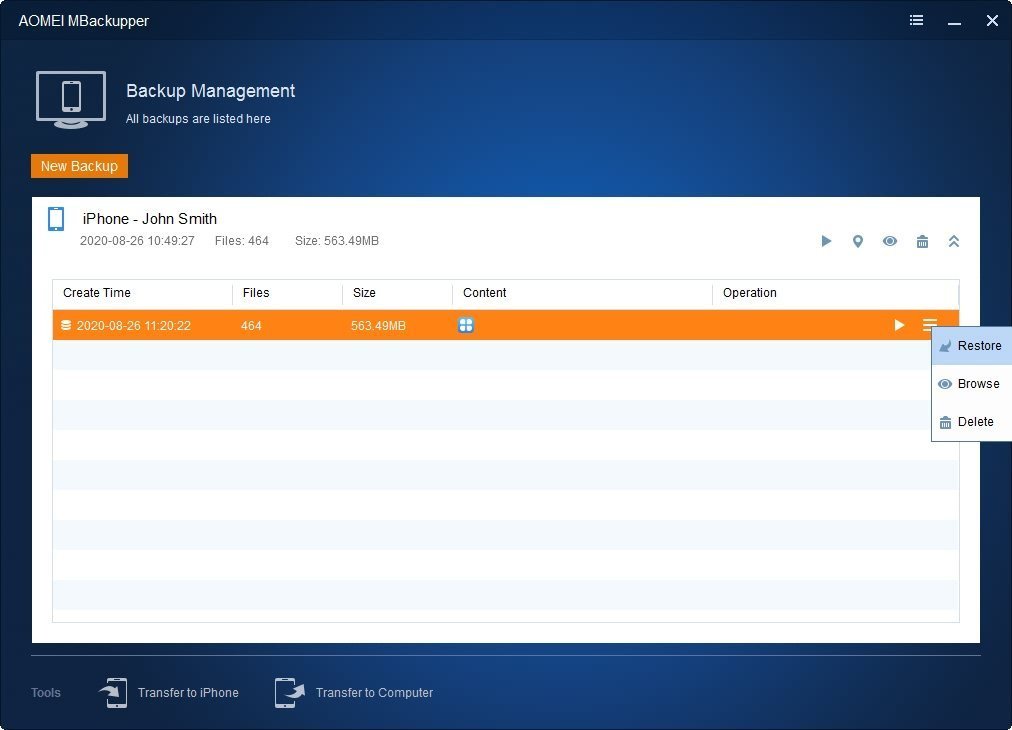
When the task is finished, you can click Back to go to the Backup Management screen. Here, you can browse, restore, and delete the backup files.
Conclusion
That’s all for the two steps to backup iPhone to Synology. After mapping the Internet location of Synology, you can be free backup your iPhone fully or selectively with the help of AOMEI MBackupper. If this guide helps you, please share it with others.