
If you are wondering how to start your first blog at less then 20$ and that too quickly (Less than 15 minutes) then you are at right place.
This is possible with the CMS (Content management system) known as WordPress as it is very easy to install and use.
So today I am going to share with you step by step process of starting your new website at less than 20$ and how to choose the best plan for you. So let’s get started.
Step 1. Pick a Good Domain Name (Blogging Niche)
This is very essential because what happens is if you were to choose the wrong niche then you might lose interest in it due to lack of focus. So choose a niche that you are inserted in and feel confident.
Here some of the points you should keep in mind when choosing a niche.
- Choose a niche that interest you and you will continue work on it, no matter what.
- Choose a niche that is easy to monetize (ads or an affiliate product).
- The niche has to have some search volume (Traffic).
Some of you might be wondering which niche might have all these plus points?
Well, there are many niches you can choose and some of them are high paying as well. One of the best examples of such niche would be affiliate sites. These kinds of niche is very popular today as it is very high paying.
Step 2. Choose a Hosting Service and Domain Name. (Hosting- 10$, Domain- 5$)
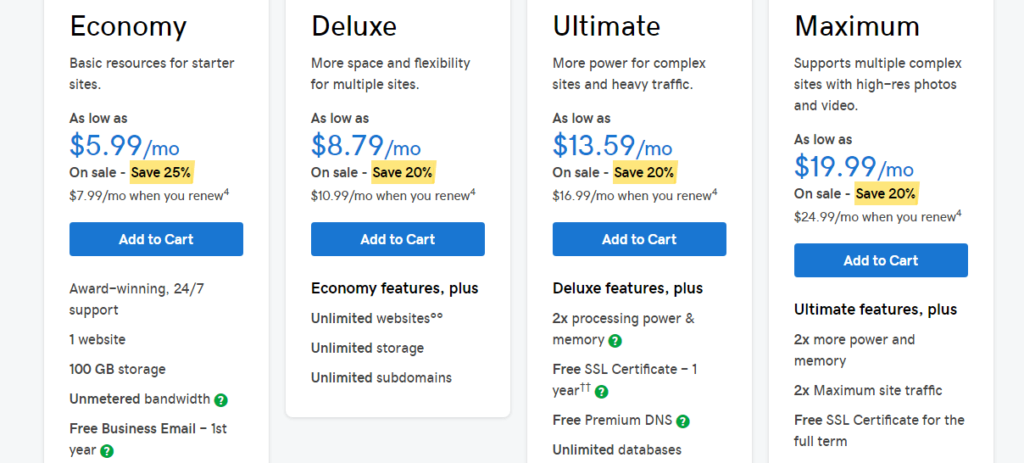
So now that you have decided your niche you will be needing a domain name and hosting service for your site. There some points you should consider such as how many sites you can add in that plan, available storage, bandwidth, server uptime, and pricing.
As for the domain name its prices are also negligible. You can get a dot com domain from anywhere between 2 to 5 dollars.
The price of hosting is also low, at just 10$ you can get a great hosting with decent features. You can choose GoDaddy hosting as they provide a great discount to first time user.
Also, if you are looking for more budgetary options, then you can wait for Black Friday deals cause on that day you will get HUGE discounts on hosting plans so you can pay for a whole year of hosting.
Step 3. Install WordPress. (Free)

WordPress is one of the famous CMS in the world. According to a recent study world’s almost 30 percent of websites are powered by WordPress CMS which is a huge number.
WordPress is very easy to use and manage on top of that it let’s create a different type of styles for your website. Almost every hosting companies provide one-click installation of WordPress in the control panel.
Once you have selected your domain name and hosting company now it’s time to install the WordPress. Look for one-click installation button in control panel and once click it, after few minutes the WordPress will be installed.
Step 4. Create a Logo. (Free or Paid)

If you don’t want to spend money on logo then you can use free services like LogoMakr, DesignEvo and Canva by using which you can create an eye-catching logo. Also, you can Create a Logo for your blog using Logo Maker app.
Furthermore, if you don’t know how to edit it or make it more attractive then there many services available on the internet which will help you create such a logo.
Some points to consider when making a logo are,
- Choose good colors that will match the theme of your blog.
- Don’t make it too complicated that no one will understand it. (You can even use the site’s name in a logo)
Step 5. Choose a Theme. (Free)
After installation of WordPress now it is time to install a theme. To install the theme on your blog click on Appearance and then on Themes.
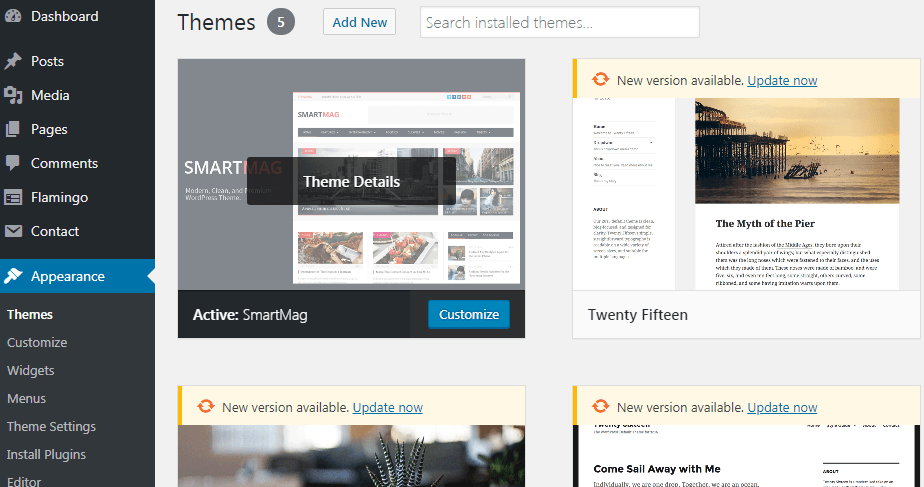
On the next menu, you will be able to see many themes including features and popular themes. You can see the preview of any themes before installation which is a great feature.
If you don’t like any free themes then you can either choose the paid themes or you can use custom themes that might not be available on WordPress store.
You can download your choice of theme from third-party sites and upload it by navigating Appearance → Themes → Add new → Upload Theme.
Step 6. Customize and Add Pages in Your Blog. (Free)
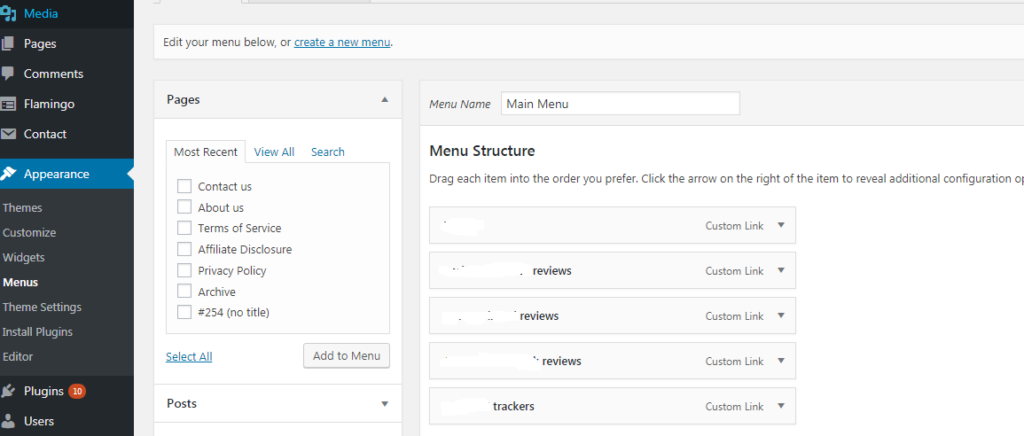
While the installed theme may look better but if you don’t like the default look and post positions then you can change it by navigating, Appearance → Menus.
You can see the customization menu in the above screenshot. Also, you can change the menu displayed on the home page with this setting.
Also, you can add pages such as contact form, about us and disclosures which is essential for your blog.
Step 7. Build an Email list. (Free)
If you want to expand your blog by increasing its traffic then there is no better way then building an email list.
The thing once the reader leaves the website he will not remember your site even if your blog is amazing. This is the most common phenomenon so to keep your readers attached to your website, the email list is important.
You can mail them whenever you publish any new post so that they can read it via their email. To create an email list you can use different WordPress plugins such as Sumo, MailChimp, Aweber or MadMimi.
Final Thoughts.
Starting a new website is not that hard. If you run into any problems simply Google it or search it on YouTube, you will find a million solutions of it.
So if you haven’t started your blog then what are you waiting for. If you have questions related to this post then do let me know in the comments. Also, I would appreciate your precious feedbacks if you have any.
Author Bio.
Richard is an enthusiastic blogger and writer who likes to read and travel. When he is not in the office he likes to go on a field trip as he enjoys roaming. He also owns a software company.
This piece of writing will help the internet visitors for creating new website or even a weblog from start to end.