Your system speed may slow down due to cluttered and unorganized disk space. It can happen due to abundant data, a lot of unnecessary files and programs, lot of unnecessary apps etc. You can follow few simple steps to clean your disk space efficiently. It will help you speed up your system performance.
Let’s discuss few steps to recover disk space on Windows 10 system.
How to Recover Disk Space on Windows 10: Uninstall Unnecessary Apps
Every system includes some unnecessary apps and programs which you don’t use ever since you have installed it. These apps include bloatware which comes pre-installed on your system and on most of the times they lie redundant on your system for no good reason. You can find and remove all such apps from your system to recover some precious disk space instantly.
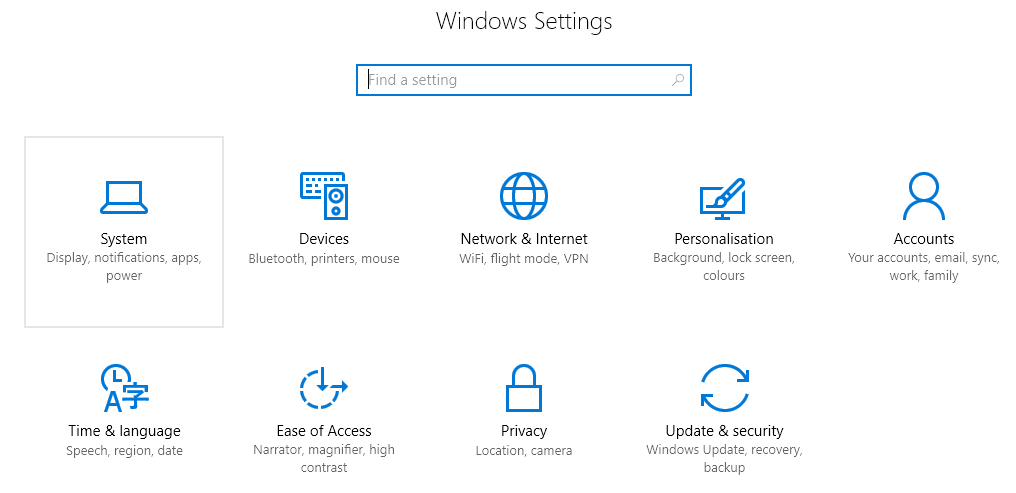
- To find out these unnecessary apps, open the Windows Settings using Windows logo key + I keyboard shortcut.
 Now go to System > Apps & features and select Sort by size option. It will organize apps according to their size instantly so that you can manage them well.
 - To uninstall any app you don’t need from the menu which is using the most space on your hard disk, select the app and click Uninstall option.
To find unnecessary legacy programs on your system go to Start menu > Control Panel > Programs and Features and uninstall them.
How to Recover Disk Space on Windows 10: Apply Disk Clean-up
Windows offers a built-in disk cleanup utility (aptly called Disk Clean-up) to its users. This utility can help you clean up disk space efficiently by deleting various unnecessary files. These unnecessary files include temporary Internet files, system error memory dump files, unnecessary files in download folders and even previous Windows installation files. Your old Windows installation files occupy a lot of disk space and stay on your system just to facilitate you downgrade your system to the previous version (which you rarely do).
-
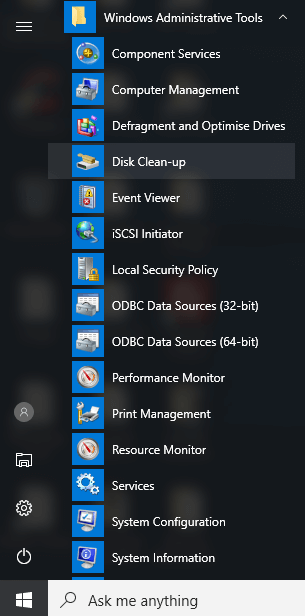
- To access this Disk Cleanup tool, go to Start menu > All apps > Windows Administrative Tools > Disk Clean-up.

-
- Select the drive you want to clean and press OK, then wait for some time until it calculates the amount of space you can clean up.

- Now select the file and simply delete it.
To remove Windows.old (previous installation files) go to Clean up system files under Disk Clean-up.
How to Recover Disk Space on Windows 10: Delete Duplicate Files
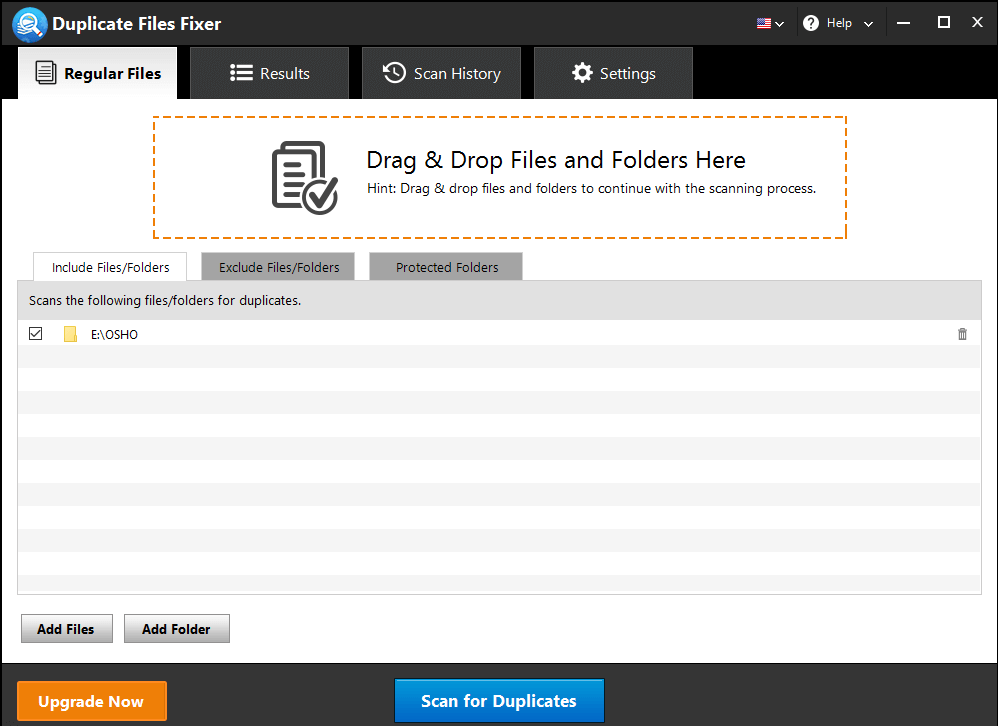
Duplicate files on your system accumulate in various forms like duplicate music, audio, pictures, videos, document etc. These files accumulate on your system due to various reasons like file sharing, file transfer, data backup etc. To delete unnecessary files like duplicate files on your system, you can use duplicate file finder tools for instant results. Best duplicate file finder tool to delete duplicate files on Windows is Duplicate Files Fixer. It scans and deletes all types of duplicate files in seconds. 
How to Recover Disk Space on Windows 10: Delete File History Versions
To do this, go to Start menu > Control Panel > File History > Advanced Settings. Under versions, change the default settings for “Save copies of files” and “Keep saved versions” as per your needs. For example, Every 12 hours or 3 months respectively.
Now click on Clean up versions link and select the file versions you want to remove from the drop down menu. Click on Clean Up button to complete the process. Click on Save changes in Advanced settings to changes take place.
How to Recover Disk Space on Windows 10: Delete Hibernation data
Hibernation mode on your system saves all your open documents and running apps to the hard disk of the system. Hibernate mode lets your system shut down completely. If you are not using hibernate mode on your system, you can consider disabling it. This will automatically remove any associated saved data from any previous hibernations.
To disable hibernate mode, go to Start menu > Command Prompt, right-click on it, and select Open as Administrator. Type “powercfg.exe -h off” and press Enter. It will disable the hibernate mode instantly.
How to Recover Disk Space in Windows 10: Clear the Update cache
The update cache feature on your Windows 10 system consists of copies of the update installation files. These files are used by the operating system in case you are ever forced to reapply an update as it saves downloading them again. To clear these cache files first you need to stop Windows update service. To do this, go to Start menu and search for Services. Select the Services from the options and right-click on it and open it as an Administrator. Scroll down the list to find Windows Update, right-click on it and select Stop.
Now to delete files, go to Start menu and search C:\Windows\SoftwareDistribution\ and press Enter. From here, you can delete anything within the Downloads folder. In the last, head back to Services and re-enable Windows Update.
These steps can help you recover a significant amount of disk space on your Windows 10 system. Additional space on your system will turn up as speed and performance booster for your system.
Hi,
Thanks for sharing this informative Guide which really helpful to recover Data space in windows system to improve system performance…!!